Pages

Subscribe:

2009/02/05

Understanding Sketch Constraints

Getting started

Understanding sketch constraints is a critical aspect of working effectively with Autodesk Inventor. This tutorial explores the impact of geometric and dimensional constraints on a simple sketch. To get started:
Close any files that are open in Autodesk Inventor.
Click File Open.
From the Project File drop-down menu, select Tutorial_Files.ipj to set your active project.
Double-click the file named sk1.ipt (scroll to the right to find this file in the display).
Double-click Sketch1 in the browser to open the sketch for edit.
Select the Look At tool from the Autodesk Inventor standard toolbar, and click Sketch1 in the browser to orient your sketch normal to the screen.
Select the Zoom tool from the Autodesk Inventor standard toolbar. Zoom out so that the initial screen image (on the left) looks more like the screen (on the right). The blue area represents space around the sketch.
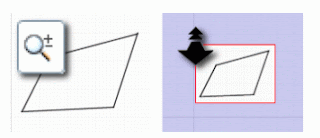

The sketch used in this tutorial contains four straight line segments drawn so the line endpoints are constrained to be coincident. Otherwise, the geometry is unconstrained.
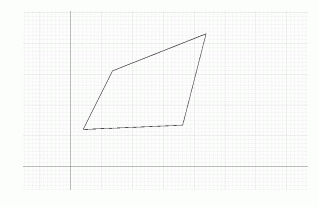


Drag all the geometry


Move all the lines:

Move your mouse cursor to the left and below the sketch geometry.
Click and hold the mouse button down, and then drag up and toward the right until the selection covers all the geometry.
Release the mouse button to select geometry.
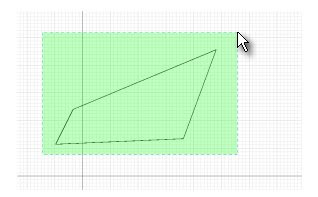


  • Move your mouse cursor over one of the lines.

  • When the line highlights, click and hold the mouse button down, and then drag up and toward the right.

  • Release the mouse button to select the new position.
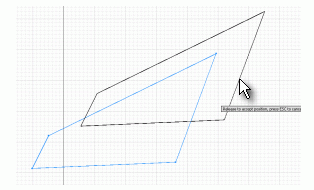


The program repositions all the selected geometry without changing the size or angle of any of the line segments.

Click in your graphic window to cancel the selection of all four line segments before proceeding to the next step.

Drag geometry

Move the endpoint of one of the lines:

  • Move your mouse cursor over the top-most endpoint.

  • When it highlights, click and hold the mouse button down, and then drag the point up and toward the right.

  • Release the mouse button to select the new position.
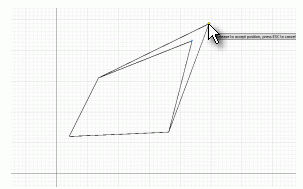

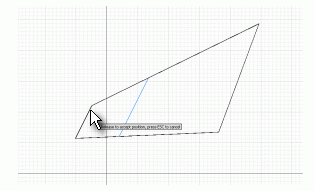
Two line segments lengthen to adjust to the new position specified for the endpoint.

2009/02/01

Document and Setting

In addition to application options, you can also control settings in individual files.
Click Tools Document Settings. Available settings are dependent on the file type (.ipt, .iam, .idw) of the current document.
You can use Document Settings to control various settings for the active document.


File properties


Each file you create can have specific properties assigned to it. Properties are grouped as follows:

General
Summary
Project
Status
Custom
Save


Physical (parts and assemblies only)
Specifying file properties helps you manage the files in your projects.

2009/01/30

Application Options

Use application options to control the way Autodesk Inventor looks and feels.
Click Tools Application Options. The Options dialog box contains many settings that you use to control your data.

Separate tabs exist for:

General
Save
File
Colors
Display
Hardware
Prompts
Drawing
Part
Sketch
Assembly
iFeature
Notebook

Use the General tab to set options that determine how Autodesk Inventor behaves when started. You may also be interested in the Colors tab where you can change the graphics background color to various solid or gradient colors or to a selected image.
These application options customize the work environment to your particular needs. You can save and name an external file that contains your personal set of options (which can be imported later).
NoteIf you work in an environment where there are other Autodesk Inventor users, you may want to import settings from a colleague. It is also possible that during the installation of Autodesk Inventor on your computer, a system administrator imported a site-specific set of application options for you.
Close the dialog box when you are ready to continue.

Understanding Files types

The default folder view contains templates based on the units and drafting standard you selected when you installed Autodesk Inventor.


Autodesk Inventor file types include:

Part (.ipt)
Sheet metal part (.ipt)
Assembly (.iam)
Weldment (.iam)
Presentation (.ipn)
Drawing (.idw)
Drawing (.dwg)

NoteParts and Sheet Metal parts share a common icon as do Assemblies and Weldments.
Templates that support different standards are available on the English and Metric tabs.

2009/01/29

Autodesk Inventor Files Type


File types

Now that the project is set, look at the types of files Autodesk Inventor uses.In the Quick Launch area (on the lower left side of the Open dialog box), click New.

This action closes the Open dialog box and displays the Default tab on the New File dialog box. Autodesk Inventor creates all files from a template. During the installation process, you made selections that determine which templates you see by default when you select New. You can access all other templates by selecting one of the dialog box tabs.


If you are a member of an established Autodesk Inventor team, there may be named tabs that are specific to your location or you may only see the supplied English and Metric tabs.


2009/01/24

2D Sketch Constraints Quick Reference

Sketch constraints control the size and position of points, lines, and curves in a sketch. They can be either geometric or dimensional.
The constraint symbol on the cursor shows the constraint type. You can add or edit constraints and dimensions to control sketch shape and size.
NOTE: The 2D Sketch Constraints toolbar changes depending on the selection.

Look at this

2009/01/20

Autodesk Inventor Tutorial

Using Shortcut Keys and Command Aliases

Autodesk Inventor provides shortcut keys and command aliases to help you
perform certain tasks more quickly. A command alias is an alphanumeric
character or character sequence used to start a command. Define a shortcut
by using any of the following keys or key combinations:
■ A punctuation key (including ` - = [ ] \ ; ' , . /), or one of the following
virtual keys: Home, End, Page Up, Page Down, Up Arrow, Down Arrow.
■ A combination of the SHIFT key along with a numeric key (0-9),
punctuation key, or one of the following virtual keys: Home, End, Page
Up, Page Down, Up Arrow, Down Arrow.
■ Any combination of SHIFT, CTRL, and ALT keys along with an alphanumeric
character.
Remember that some shortcut keys and command aliases are active in specific
environments only.

TRY IT: View a complete guide to shortcut keys and command aliases

1 Open Autodesk Inventor.
2 On the Standard menu, click Tools ➤ Customize ➤ Keyboard tab. For
each category, there is a list of the command name and its associated
shortcut or alias, if one exists.
3 Click through several categories to see the associated commands.
The following is a list of some of the commonly used shortcut keys and
command aliases.

Key Result

F1 Displays Help for the active command or dialog box.
F2 Pans the graphics window.
F3 Zooms in or out in the graphics window.
F4 Rotates objects in the graphics window.

Key Result

F5 Returns to the previous view.
F6 Returns to isometric view.
B Adds a balloon to a drawing.
C Adds an assembly constraint.
D Adds a dimension to a sketch or drawing.
DO Adds an ordinate dimension to a drawing.
E Extrudes a profile.
FC Adds a feature control frame to a drawing.
H Adds a hole feature.
L Creates a line or arc.
P Places a component in the current assembly.
R Creates a revolved feature.
S Creates a 2D sketch on a face or plane.
T Tweaks a part in the current presentation file.
ESC Quits a command.
DELETE Deletes selected objects.
BACKSPACE In the active Line tool, removes the last sketched segment.
ALT + drag mouse In assemblies, applies a mate constraint.
Key Result

In a sketch, moves spline shape points.

SHIFT + right-click Activates the Select tool menu.
SHIFT + Rotate Automatically rotates model in graphics window. Click to quit.
tool
CTRL + ENTER Return to previous editing state.
CTRL + Y Activates Redo (revokes the last Undo).
CTRL + Z Activates Undo (revokes the last action).
When the 3D Rotate tool is active, switches between dynamic rotation
and standard isometric and single plane views.