Understanding sketch constraints is a critical aspect of working effectively with Autodesk Inventor. This tutorial explores the impact of geometric and dimensional constraints on a simple sketch. To get started:
Close any files that are open in Autodesk Inventor.
Click File Open.
From the Project File drop-down menu, select Tutorial_Files.ipj to set your active project.
Double-click the file named sk1.ipt (scroll to the right to find this file in the display).
Double-click Sketch1 in the browser to open the sketch for edit.
Select the Look At tool from the Autodesk Inventor standard toolbar, and click Sketch1 in the browser to orient your sketch normal to the screen.
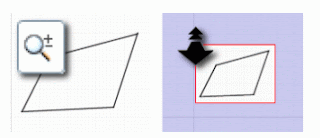
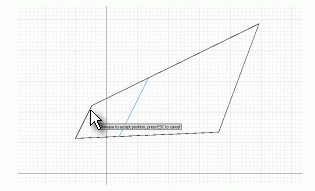
Select the Zoom tool from the Autodesk Inventor standard toolbar. Zoom out so that the initial screen image (on the left) looks more like the screen (on the right). The blue area represents space around the sketch.
The sketch used in this tutorial contains four straight line segments drawn so the line endpoints are constrained to be coincident. Otherwise, the geometry is unconstrained.
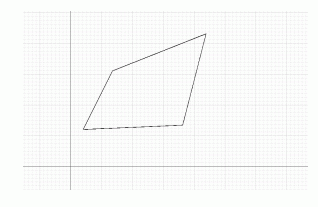
Drag all the geometry
Move all the lines:
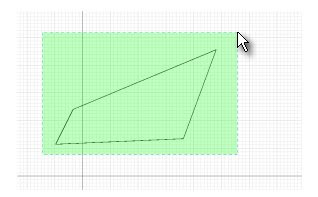
Move your mouse cursor to the left and below the sketch geometry.
Click and hold the mouse button down, and then drag up and toward the right until the selection covers all the geometry.
Release the mouse button to select geometry.
Move your mouse cursor over one of the lines.
When the line highlights, click and hold the mouse button down, and then drag up and toward the right.
Release the mouse button to select the new position.
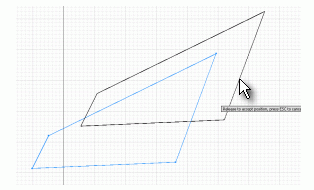
The program repositions all the selected geometry without changing the size or angle of any of the line segments.
Click in your graphic window to cancel the selection of all four line segments before proceeding to the next step.
Drag geometry
Move the endpoint of one of the lines:
Move your mouse cursor over the top-most endpoint.
When it highlights, click and hold the mouse button down, and then drag the point up and toward the right.
Release the mouse button to select the new position.
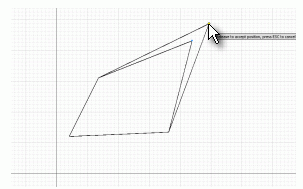
Two line segments lengthen to adjust to the new position specified for the endpoint.


82 komentar:
haloo...
permisi pak, numpang promo nih ^^!
salam kenal dari Bali.
wah mas benar2 berwawasan tinggi ...malu saya d bandingin dgn blog saya hehe...
wah..
nice tutorial
Nice tutor sob
regards...
Wah, Saya jadi pengen belajar 3D nie....,
Nice Blog....,
waduh waduh, keren banget, sayang anak akuntansi jadi sekarang belum perlu untuk dipelajari
Akhirnya bisa blog walking setelah gak bisa akses internet.
Terimakasih telah berkomentar di blog saya
salam
RAJA KOMENTAR
waduh pak,,aku gak begitu paham dengan bahasa inggris,,jadi gak bisa ngereview postingannya deh
Nice post bro, I recently found that learn such thing wasn't easy way
kalau bhs inggris gini aq nyerah aja deh, g paham, d tunggu folow baliknya juga
wah share ilmu yang menarik! pak, very good lesson, very helpful!.
Tukeran follow nyuk sobat mau??! di tunngu kabarnya yap!
nice blog too...nice to meet you ^^
nice tutuorials
thanks for share
Nice blog, thanks for your helpful infomation
wah berkunjung sob
berbahasa inggris
ane gak ngerti
hehehe
tapi mantap
nice share, thanks!
also thanks for dropping by my blog, im returning the favor and just follow your blog, I'll come back to visit when I have more time!
have a nice day!
Ajib!
be tried, let alone a good design
should learn more grafih ya, let me quickly can
Nice sites Nice Idea Good Job and Sucess for you
Salam kenal.
good info. nice to share.
Thanks
g ngerti aq,
bhs inggrisan smua.
hmm....
tpi keren tutorialnya,
andaikan q ngerti.
:(
terima kasih atas sharenya mengenai menggambar tehnik.
ijin menjadi foLLower di bLog yang keren ini, saLam persahabatan.
Nice content mas
Subhanallah..
mat kenal shob...
artikelnya mantap gan. sukses selalu
artikelnya mantap gan. sukses selalu
info keren bos...(ngekor aja...he...he) salam hangat
dengan sketsa seperti, diharapkan akan mempermudah daLam meLakukan proses menggambar. terima kasih.
waaaooowww.. thanks...
Postingan kelas berat....belom nyampe niy otak :)
Mantab mas postinganyam berbobot .....
info yang bagus kawan
sukses selalu ya
salam sobat
nice post.
artikel2 sangat bermanfaat.
trims kunjungannya ke S.A
menarik
salam persahabatan
cuanggih!
Mantab !
nice sob...
ane gak bisa englist brow...
salam kenal yeah
kunjungan balasan
assalamualaikum
alhamdulillah saya sempat berkunjung ke blog ini lagi
setelah membalas komentar Anda di blog kangmusa tentunya
dan selalu saja posting yang Anda sajikan sangat menarik dan inspiratif
seperti mengajak untuk menjadi lebih baik dan lebih baik lagi ke depan
semoga saya bisa mengambil pelajaran berharga dari posting-posting Anda
jangan lupa untuk berkunjung balik ke http://www.kangmusa.com
salam hangat
kangmusa
nicha share my firned.
in english ya.:D
salam kenal :)
3D line kaya baru denger ya saya
nice tutorial,, but im not understanf because this post using english language
wah inggris yah,saya hanya bisa melihatnya saja deh,nanti saya translate dulu.he...he...salam kenal
Enggk ngeri nih gan,,,saya copy ke GT dulu lah klw gitu,,,,siapa tahu ada info menarik!
Baca2 bentar,,,,,translate dengan hati2...tq sudah berbagi dan salam kenal
wahh, seni geometri nih ya Mas? entar dulu, saya belum baca tuntas, saya coba pelan2 ya..
siip
dulu saya pernah belajar gambar mistar di SMA. ya kurang lebih seperti ini kali ya..
ya ampuun memang menarik Mas.
kurang paham sih soalnya inggris hehe
Keren banget :)
maaf kurang mahir berbahasa inggris :D
comeback
berkunjung kembali di blog yang pinter ini.
Nice share sobat ... :D
makasih tutorialnya :-)
Salam kenal ya...
silahkan saya undang mampir juga ke blog saya mbak,, agan2 sekalian :-)
minta komentarnya heheehee
Kunjungan peradana ...
Salam kenal mas, tak lupa juga
buat teman2 BLOGGER lainnya ... Hehehehe
( silahkan mampir, di GUBUK saya mas)
gak ngerti ane gan....
kunjungan siang gan.. salam kenal.. moga bisa jalin silahturahmi untuk semua...
buat sobat blogger jangan lupa mampir ya...
waw artikel yg bagus mas , saya ampe2 gak ngerti bahasanya tp coba di translate sedikit demi sedikit hehehe.. thanks for share mas :D
admin "variasi blogger"
Mau koment pake bahasa inggris tapi nggak ngerti gimana caranya buat kalimatnya, soalnya bisa bahasa inggris just a litle,hehe....ya akhirnya ini saja, nice shared...!!!
wow
this is goog tutor gan :)
comeback
Good job for this article. I very like this !!! Be success forever :)
kren artikelnya gan, mantap
Makasih kka
Makasih artikelnya bermanfaat banget nih.. salam kenal http://mba-yanti.blogspot.com/
saya suka sketsa, tapi kalau geometri saya angkat tangan soalnya susah :/
belajar dlu .. sippp.. skalian blogwalking
mampir yaa http://naruensiclopedia.blogspot.com/
very helpful... nice post
mampir-mampir di kunjungan paling perdana..izin nyimak ya ...d tunggu silaturahmi baliknya :) di:
http://jagadkawula.blogspot.com/
Thanks nice postingan sangat bermanfaat
Thanks mas tutor nya...:)
Ikut meramaikan blognya ^_^
Menyimak aja gan, walau gak mudeng xixixi
Wow... what this? I confuse to understand it... So difficult for English beginer like me...
ini postingan lama masih ada :)
meskipun haru translate,tapi saya paham karena gambarnya ;)
g mudeng q mas hehehe
wah ini mirip kaya pembelajaran auto card yah
dalam bahasa indonesianya seperti apa nih mas
Wow muantappp juragan.
Ahi hi hi.
Nice posting gan. Ilike this
Keren gan. Yang kayak ginian bermanfaat
Posting Komentar